
This guide will give you all of the information you need to kickstart campaigns using TONIC.
Chances are you’ve already heard about the traffic network TONIC.
These guys are based in Munich, Germany and can provide you with domain traffic.
If you see them at a conference, stop by to say hello and you have a good chance of getting a cool t-shirt from them!
If you are familiar with Zeropark already as one of the main domain traffic sources then TONIC is a good alternative and they can also provide you with pop traffic.
How to set up your first campaign on TONIC
The first thing you’ll have to do is register a new account here: https://tonic.com/advertiser/register
Once you are logged in and approved (which can take couple of days) you’ll need to transfer your funds to your advertiser account.
The minimum deposit is $100 via PayPal or $1,000 by wire transfer. Unfortunately, credit cards are from $5000+.
Before setting up any campaign you should use the Traffic Estimator tool to find out the volumes and prices for your category.
Here is an example of traffic estimation in Germany for Finance category + Desktop:
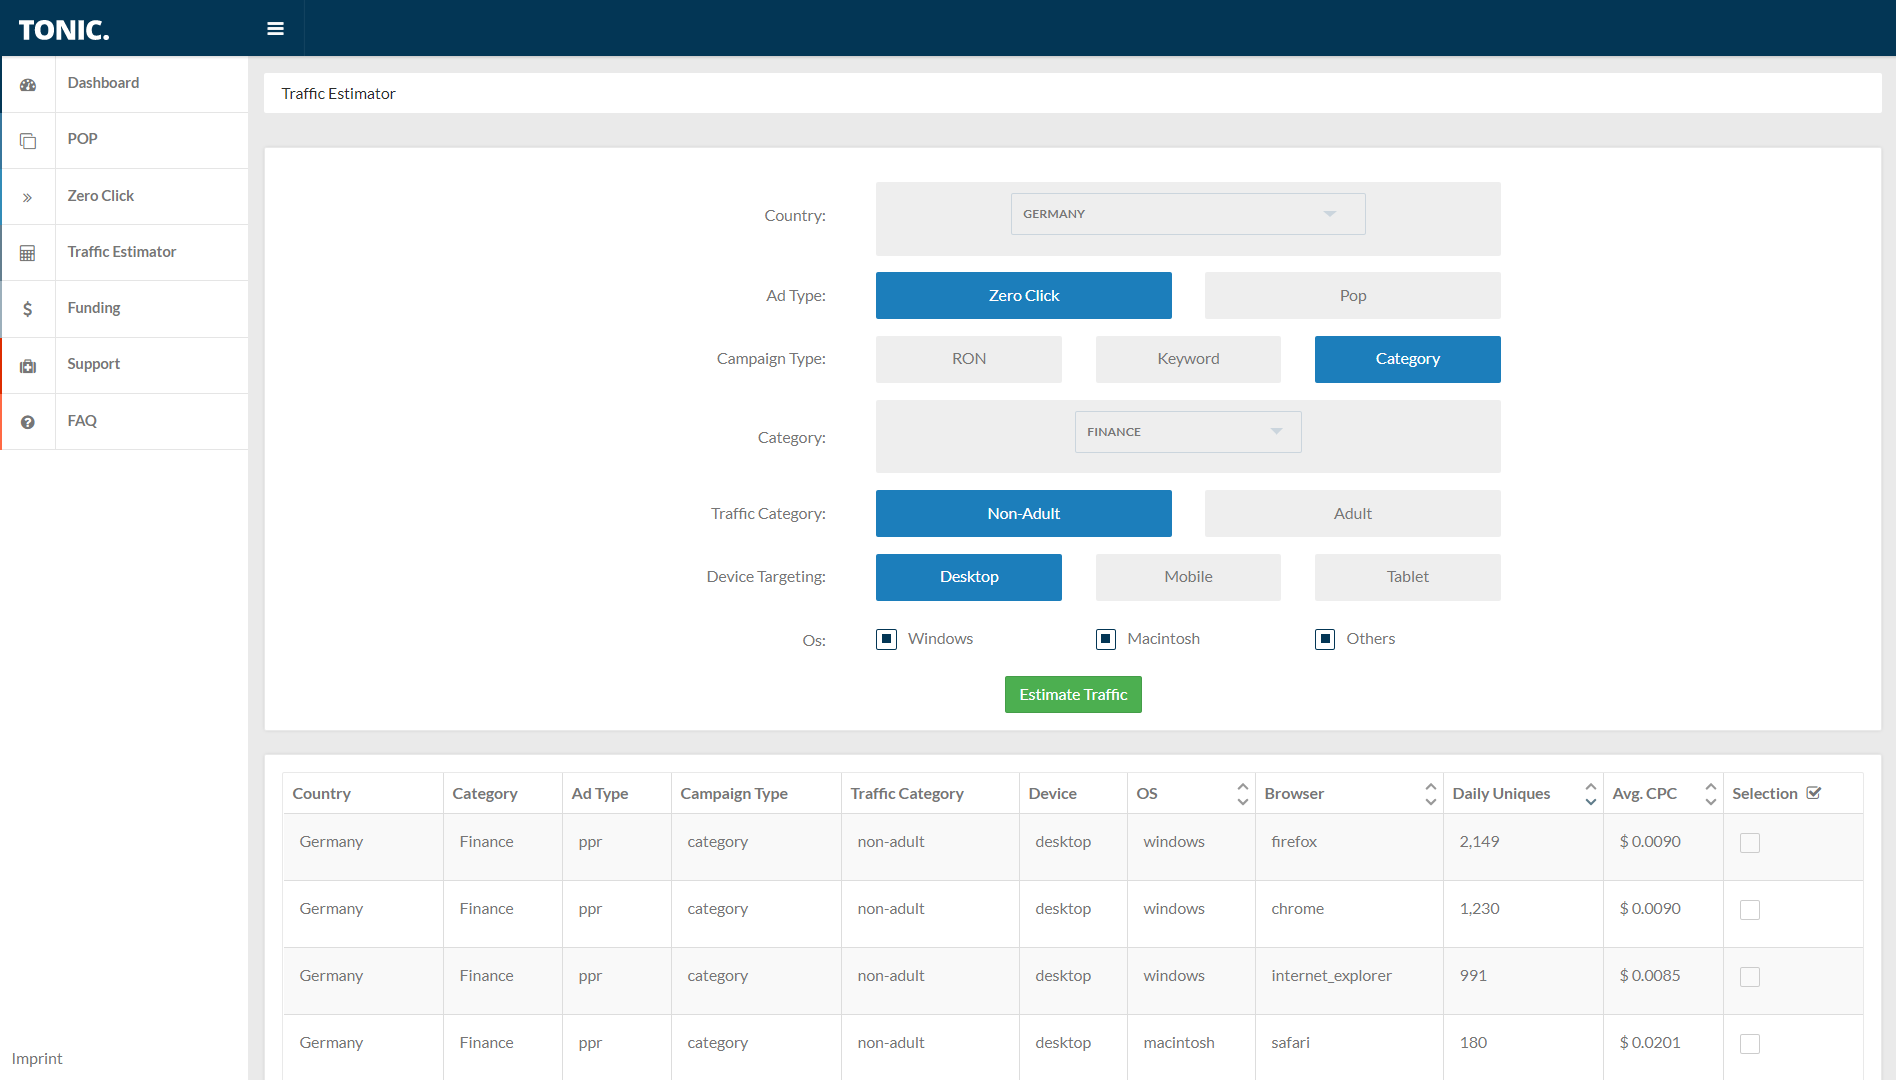
You can see average price per click there and I would suggest you start a new campaign on 50% of the displayed CPC. You will still get plenty of traffic and enough data for optimization.
Another tactic can be to run RON campaign with as little targeting as possible because the more you target your traffic the more you compete with bidders for a particular category.
Let’s create your first campaign
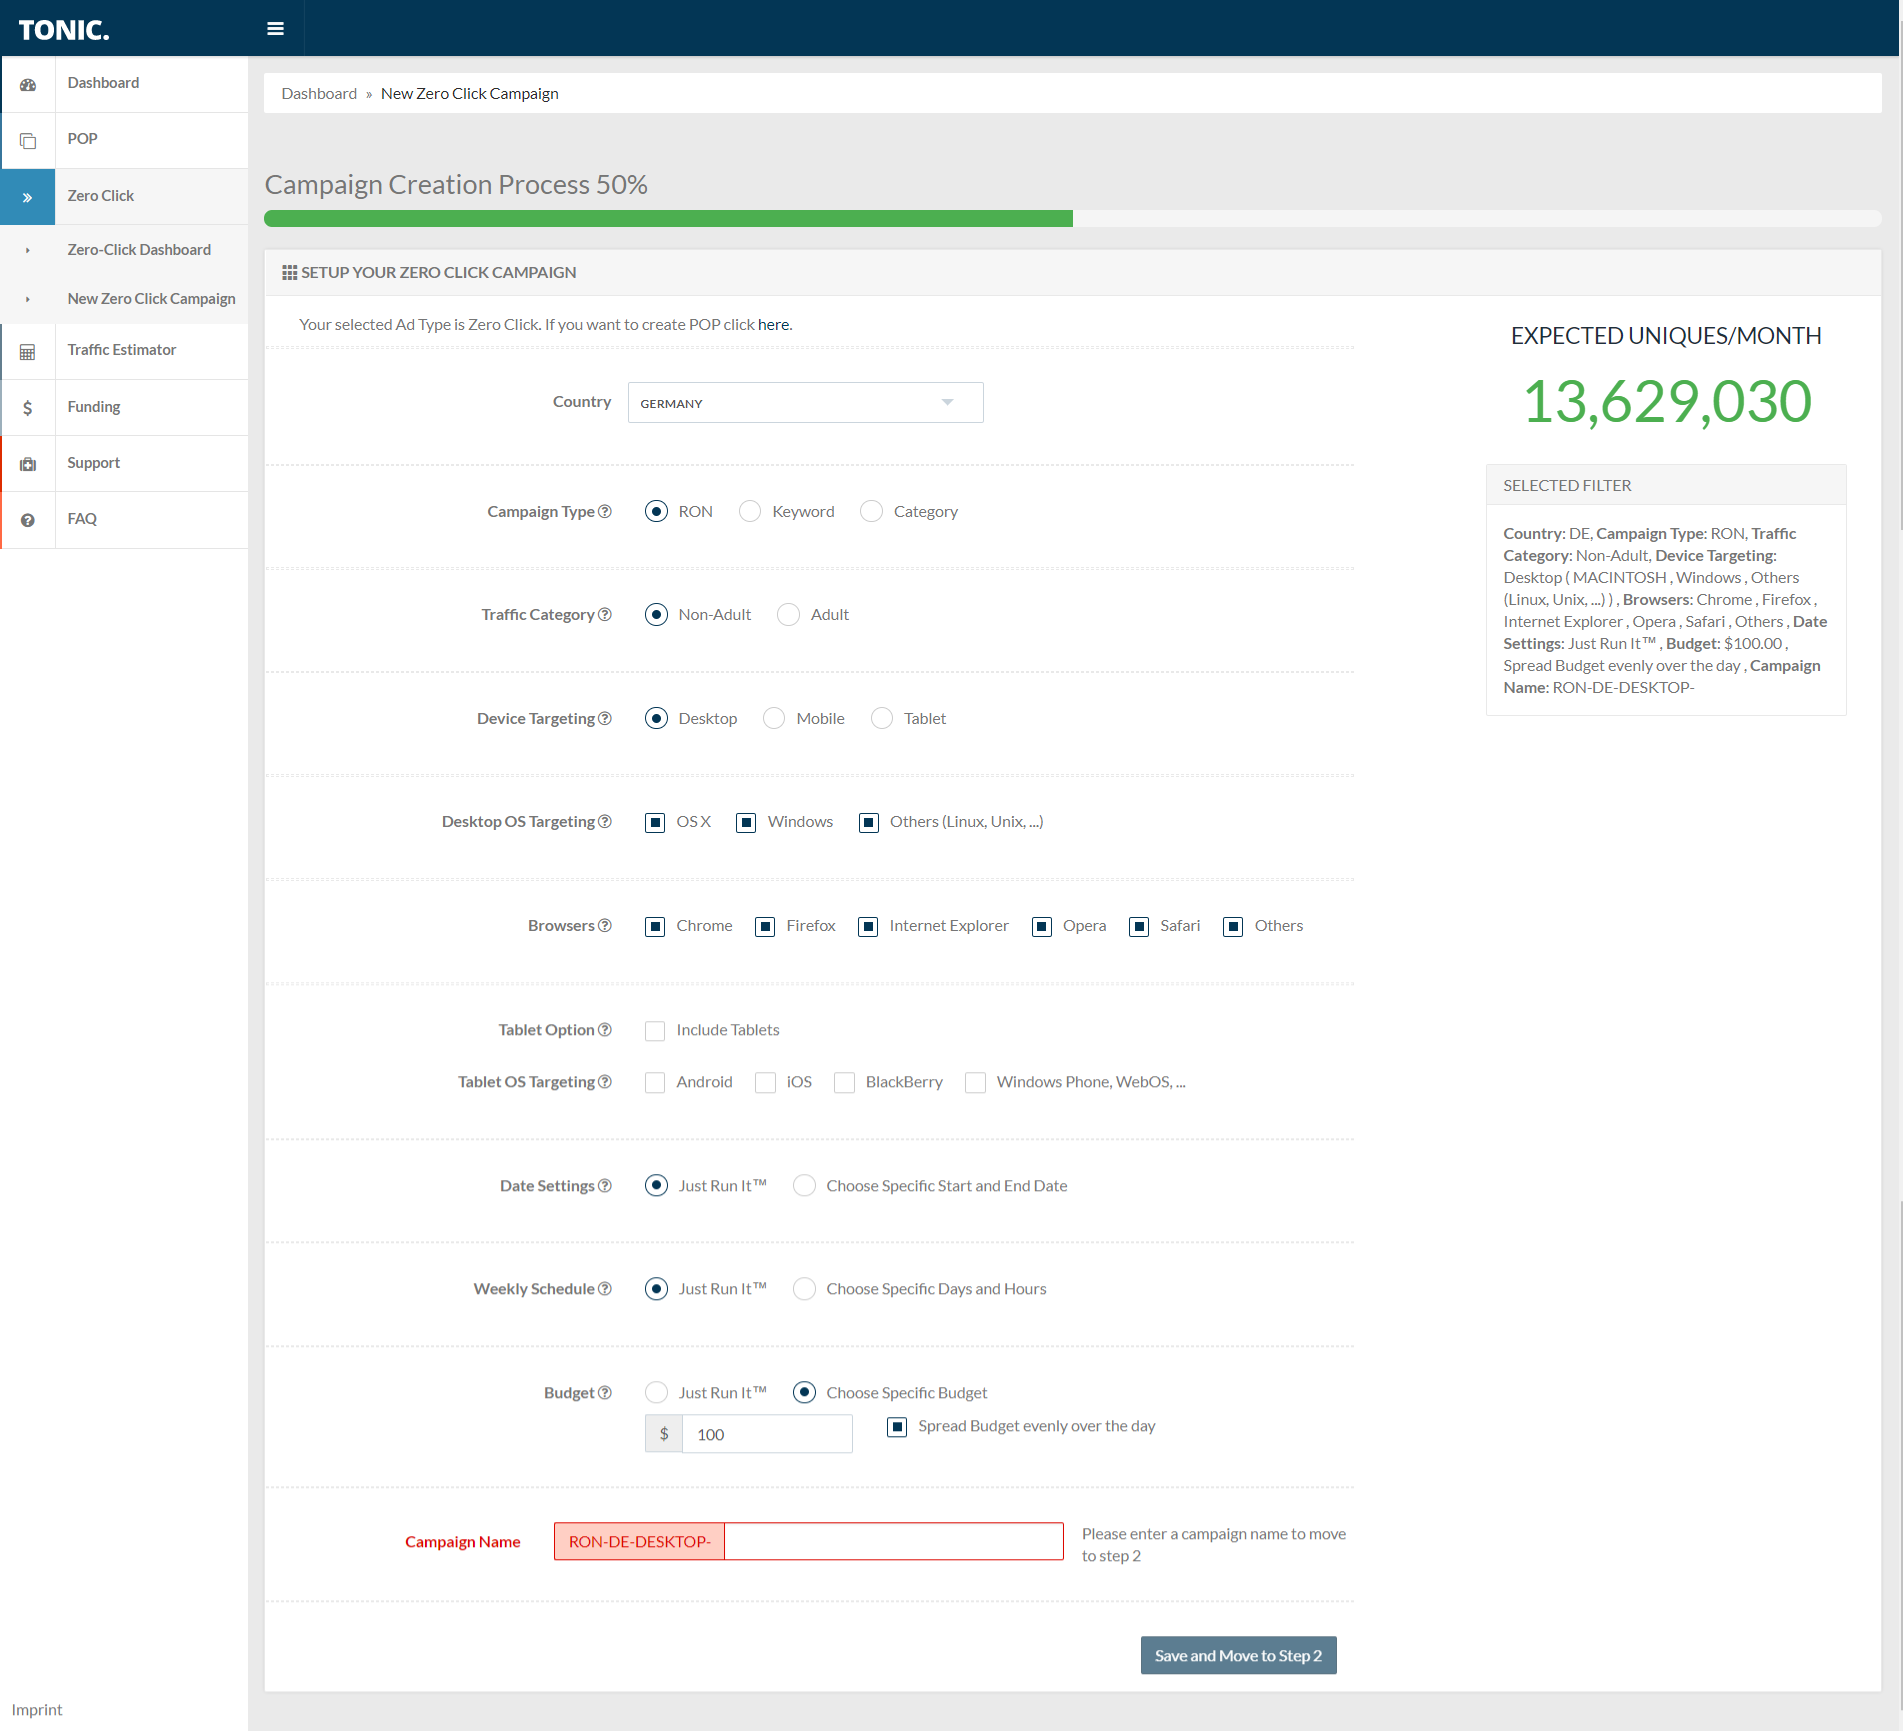
TONIC has a nice feature where you can see estimated traffic volume according to changes in your campaign settings. Just choose a targeting you need, and you will see if you have an audience big enough.
TIP:
DO NOT mix desktop and tablet traffic together. Each category has a totally different price per click and you could end up getting too expensive tablet traffic, low-quality desktop traffic or mix of both.
Regarding Budget settings – always choose a specific budget as you don’t want to be unpleasantly surprised by burning all your money in the account just in 2 hours.
I would suggest keeping the budget spread evenly over the day as it gives you more relevant data for optimizing your campaign after a couple of days.
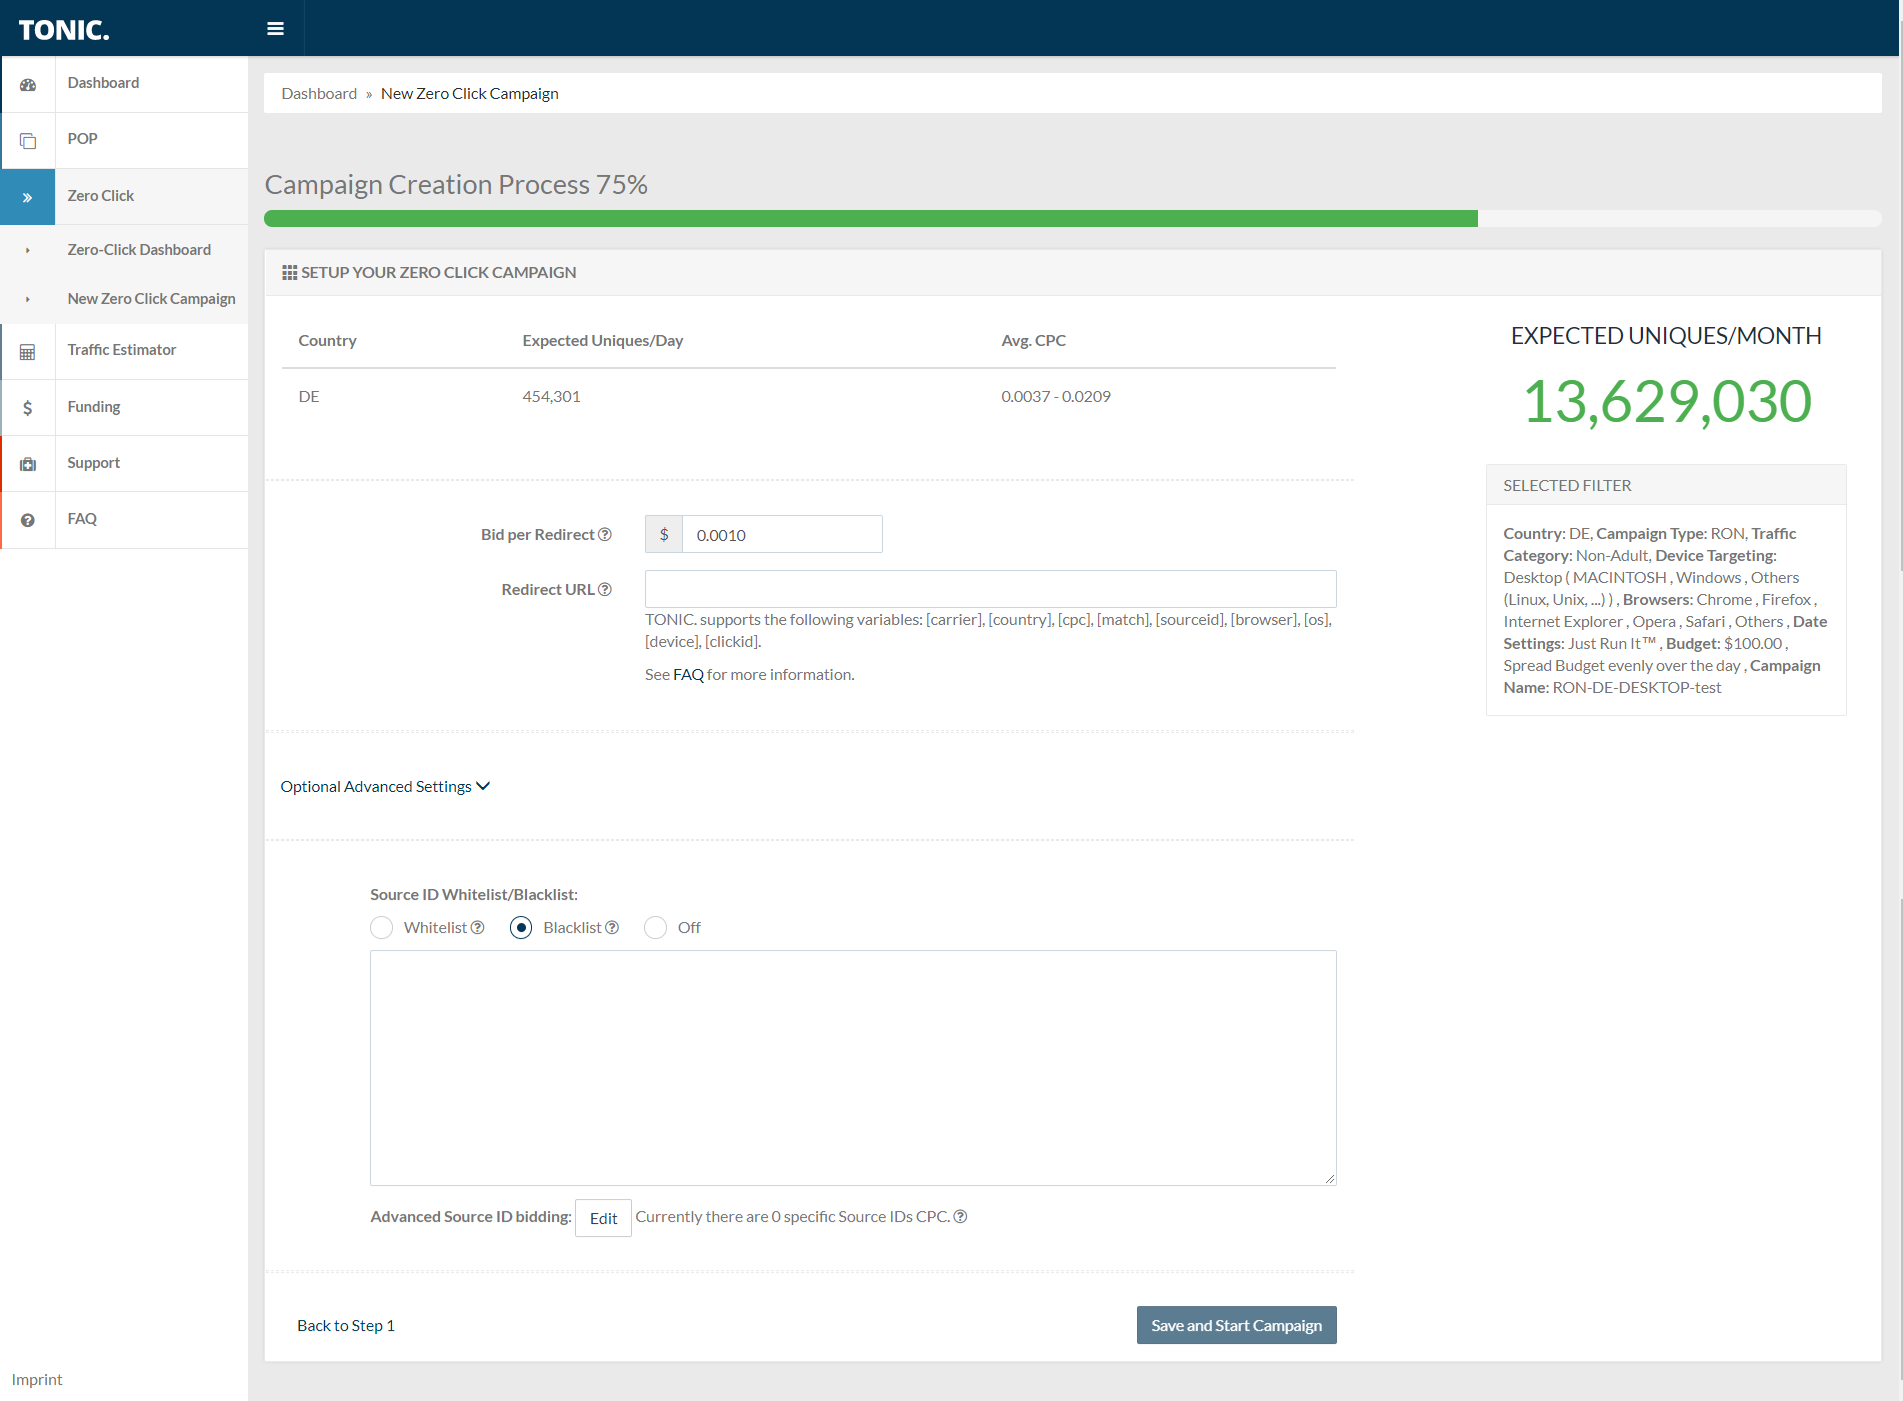
In the second step you choose your bid and campaign URL. Don’t forget to use all variables available in your link as it will help you in your campaign optimization later.
Here you are also able to blacklist or whitelist source IDs from the reports in your tracker. The best practice for TONIC is to only use a blacklist as the inventory is not that big and your CPC on whitelist campaigns can get pretty high.
You can also play with bidding on particular source IDs – it’s the same feature that Zeropark has. If you have any “golden list” of IDs which bring you the biggest ROI, you can outbid your competitors there.
In summary, setting up a campaign is super easy and the platform is very newb friendly, so I wouldn’t be afraid to start with my first paid campaigns on TONIC.
Here is a link to official TONIC YouTube channel so you can watch their video guides as well:
https://www.youtube.com/channel/UC-d0-8t0k28JU80myLnC3rQ
So what are you waiting for?
Set up your first campaign and make it rain!
Pros
Clear user-friendly interface
Good optimization options
Newbie friendly
Cons
No support or managed campaigns for small budget accounts
Lower volume in certain GEOs
Quality of traffic can vary